Giving a shot at making a game using Godot Engine 3.0
Hello!
In the past week, I’ve been working on a simple 3D game using Godot Engine 3.0 (go-doh). In this article, I will show off some of the features and discuss how it all works. Here’s a quick demo of the gameplay:
Mechanics
Block breaking
Blocks can be broken by just clicking on a tile of the chunk. The speed of the breaking and the damage dealt to the tile depend on the current pickaxe. Pickaxes can be upgraded in the Shop GUI. Pickaxes also have a durability value, which will always be kept at maximum when you’re on the surface. The current pickaxe along with it’s durability is displayed in the bottom right corner of the screen. When your pickaxe “breaks”, you will stop mining and you won’t be able to start mining until you repair it or return to the surface.
Bombing
Blocks can also be broken using bombs. By placing a bomb, it takes approximately 3 seconds to detonate and it damages blocks in a 4 tile radius. Tougher blocks located deeper in the mine wont be broken by a bomb, instead made softer and thus they will take less time to mine with a pickaxe. When a bomb blows up tiles, you won’t get them in your inventory.
Shop
In the shop GUI, you can sell your mined blocks for money or buy items like torches, bombs and better pickaxes. Money can only be earned by selling the blocks you’ve mined.
Minerals
This is the list of minerals currently generated in the chunk and their yield when sold:
- Copper - $15
- Iron - $20
- Silver - $50
- Gold - $100
- Amethyst - $250
- Emerald - $300
- Sapphire - $400
- Ruby - $500
- Diamond - $1000
- Flawless Diamond - $2500 (rarest)
Note that all of these are not guaranteed to generate. It depends on the random seed and the y value.
Scenes
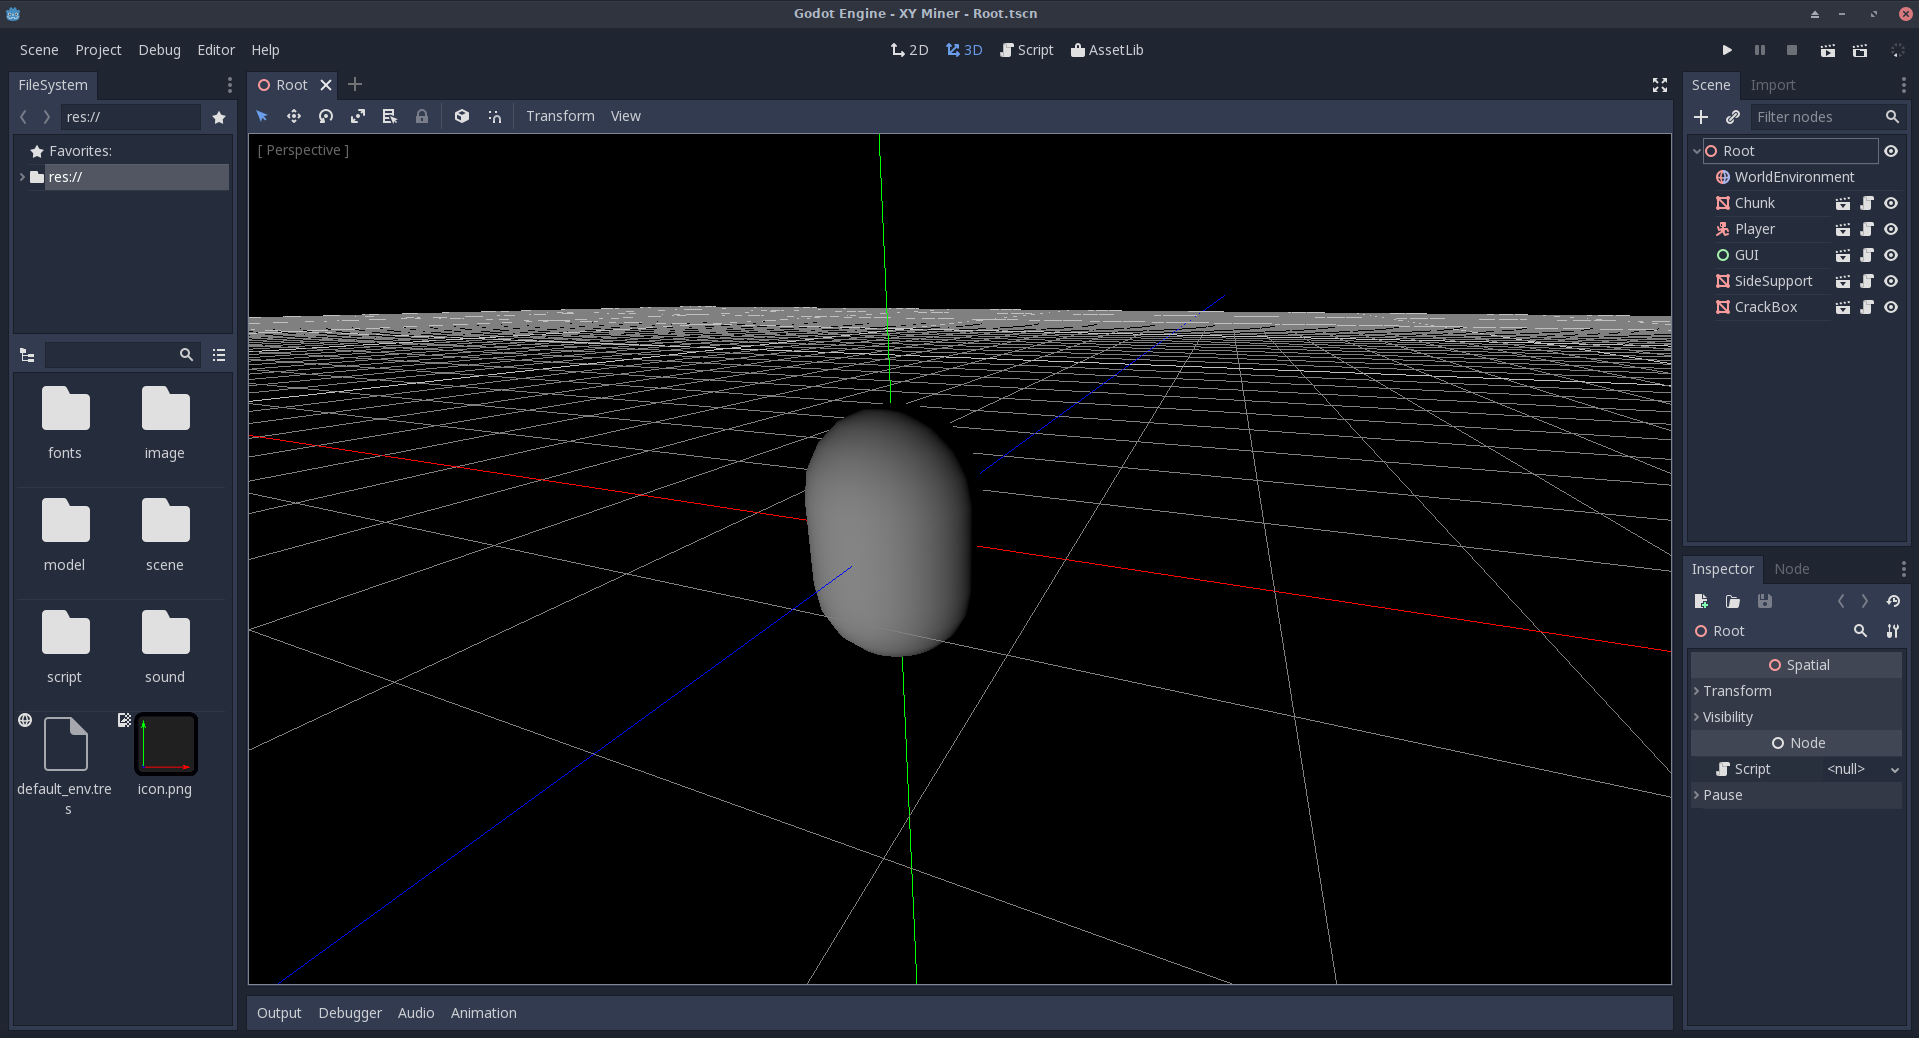
Godot uses Scenes, which can be easily instanced. The following image is the Godot editor, in it I have opened the root scene, which will be the point where the game runs.
On the right, you can see the scene tree.
- **Root** - This is the first node in the scene, containing everything.
- **WorldEnvironment** - Controls the overall look of the scene. I have configured it to give me a completely black scene without a background.
- All of my other custom scenes follow these.
The Chunk
The Chunk is a MeshInstance which I use to generate a random mine with. I’ve attached a script to this node which generates a mesh and assigns it to the MeshInstance.
Using SurfaceTool, you can create geometry by specifying the vertices individually.
# Create a new SurfaceTool instance
var st = SurfaceTool.new()

# Begin specifying your vertices using primitive type of triangles. Every 3 vertices is a triangle.
st.begin(Mesh.PRIMITIVE_TRIANGLES)

# Half of a quad
st.add_uv(Vector2(1,1))
st.add_vertex(Vector3(0,0,1))

st.add_uv(Vector2(1,0))
st.add_vertex(Vector3(0,1,1))

st.add_uv(Vector2(0,1))
st.add_vertex(Vector3(1,0,1))

# Output the mesh
var mesh = st.commit()
This is just a basic example of what you can do with SurfaceTool, but as you can see, it’s a great way to create procedural geometry. Alongside this I use some code to decide which material to use for which tile and the ability to regenerate the mesh when a tile is changed.
The Player
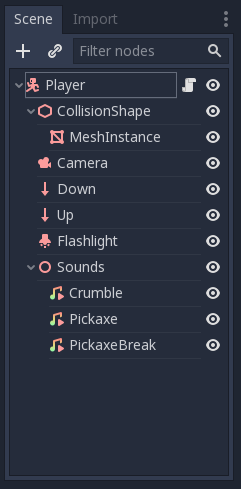
The player is currently just a simple CapsuleMesh with a camera, a light, some raycasts and some sounds attached to it.

The script attached to it deals with KinematicBody movement and the block break animation. The RayCasts are used to determine whether the player is colliding with the chunk or not. The RayCast pointing up is used to cancel the jump when player hits a tile from below.
The GUI

GUI in Godot is created using the Control class and it’s inherited classes.
In the GUI scene I have a simple ItemList inventory and a few other items. The main thing the GUI does is the shop: buy and sell system.

On the righthand side, there are two image buttons that spawn an instance of another scene and translate it to the player’s current position. These two buttons are Bomb and Torch, which “place” their respective item.
# Load the scene
var scene = load("res://scene/props/bomb.tscn")

# Get the root instance of the scene, in this case it's a Spatial
var node = scene.instance()

# Translate the Spatial
node.set_translation(Vector3(x, y, z))

# Add it to the Root scene
get_node("../").add_child(node)
SideSupport
This scene generates 4 quads that cover the chunk. These prevent the player from walking off of the chunk or falling out the bottom.
CrackBox
This scene generates a quad that has a variable texture. This scene is used to display the breaking animation of a tile, by translating it to the currently “broken” tile and setting the Texture of the material to one of the 6 crack textures.
The Source
The source of this project is available on my GitHub account. I’ve laid out the scenes, scripts, etc. into a nice folder structure so you can easily see where the things are located. I recommend you do the same when you’re making a game in Godot. If you want to try the game yourself, you can clone or download the repository onto your computer and Import it in the project list of the editor. Downloads are not currently available as the game is still in development, but you can easily export them in the editor.
Conclusion
I think that Godot is a really great game engine. It lets you do amazing things quite easily. The community is also very helpful and the documentation is good enough for you to get started. This game still needs work for it to be enjoyable, but it’s been quite fun getting this far and I thought I’d share it with you.